 FREE Shipping* on all orders over $400


HOW TO CAPTURE CLEAR AWARDS WITH CRYSTAL PRODUCT PHOTOGRAPHY TIPS
Snapping the right photo can be the difference between capturing the message you're trying to get across or not. This is especially true in our methods when photographing a transparent subject, like one of our crystal awards.
While a sturdy tripod may be required for both, photographing, photographing clear material awards is not the same as taking photos of a model or landscape; it's far trickier trying to get the various elements of photography to work with the clear awards before your lens. Now, it's not an impossible task, and quite honestly, it's quite easy once you get the hang of it.
The basic rules of photography apply when shooting acrylic, glass, or crystal awards as they do anything else. In the following article, we'll go over some crystal clear product photography tips to help you photograph a crystal award more effectively, making the task easier for you.
Lighting the Crystal Awards
Lighting is the very essence of photography. The Greek root of light is "photo", while drawing is "graph;" combine the two and you'll get a communicatory medium that can't be matched by anything else.
USE A NATURAL LIGHT SOURCE TO ILLUMINATE A CLEAR OBJECT
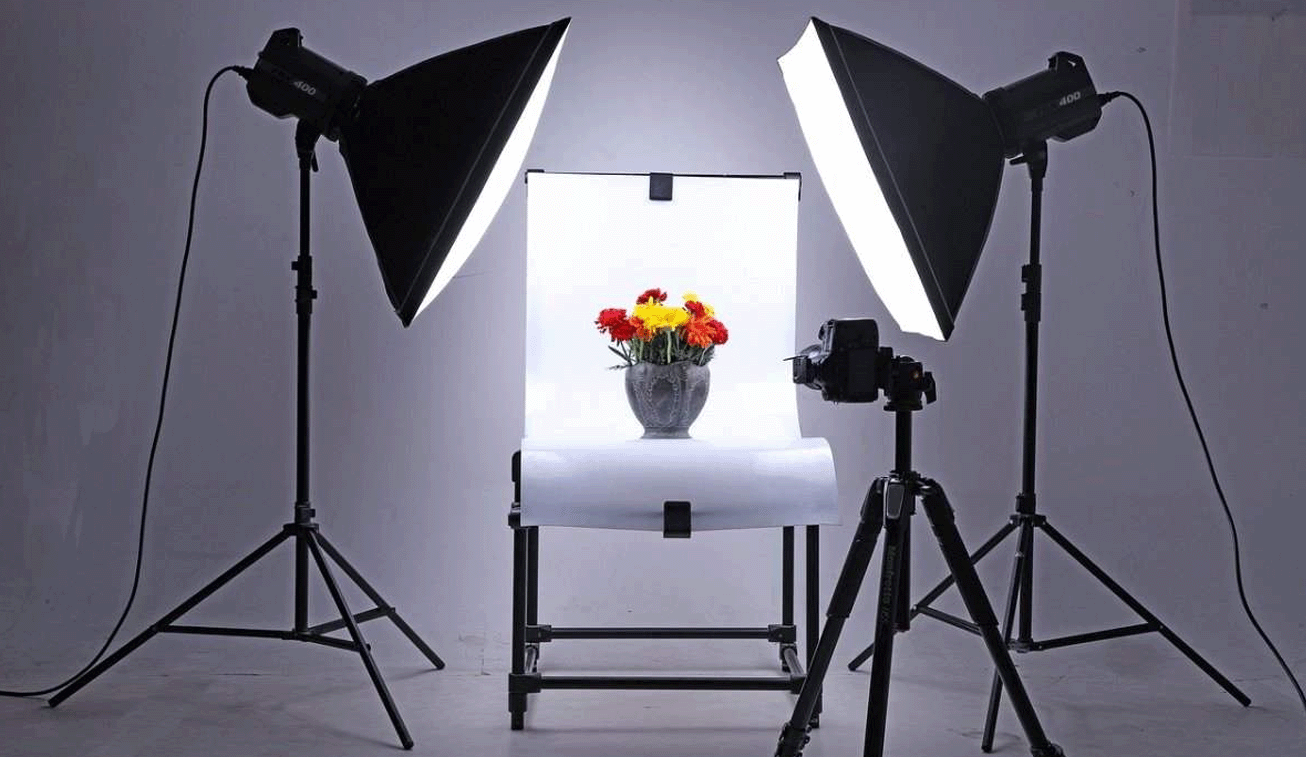
When setting up your stage or photo-area, you must make sure that there's enough light to fully illuminate the awards you wish to frame but not so much that the glass or crystal awards are overexposed. Using softbox lamps are the best means of lighting up the stage and award.
Softbox lamps and diffusers help evenly distribute light waves to the object, ensuring no harsh reflections or shadows. This is especially true with product photography, where the main idea is to showcase the aesthetics of the award you've created.
You're able to control the amount of exposure the award receives softbox lamps. The square-shaped covers filter the blast of light coming from the bulb; some would describe its effect as natural light coming in through a window.
Another technique that we've found to work effectively is placing open-bulb lamps towards the back of the awards. Whether you're shooting at a cyclorama wall or DIY studio, illuminating the wall that faces the back of your awards bounces more light onto the crystal awards. Brightening a contrasting background features the object more favorably.
Staging and Setting
Previously, we mentioned the space that you're photographing these crystal or glass awards is an important part of getting your clear product photography to appear high quality; it's necessary to have the right setting to produce adequate photos.
CHOOSE A DARK CONTRASTING BACKGROUND SOURCE TOO
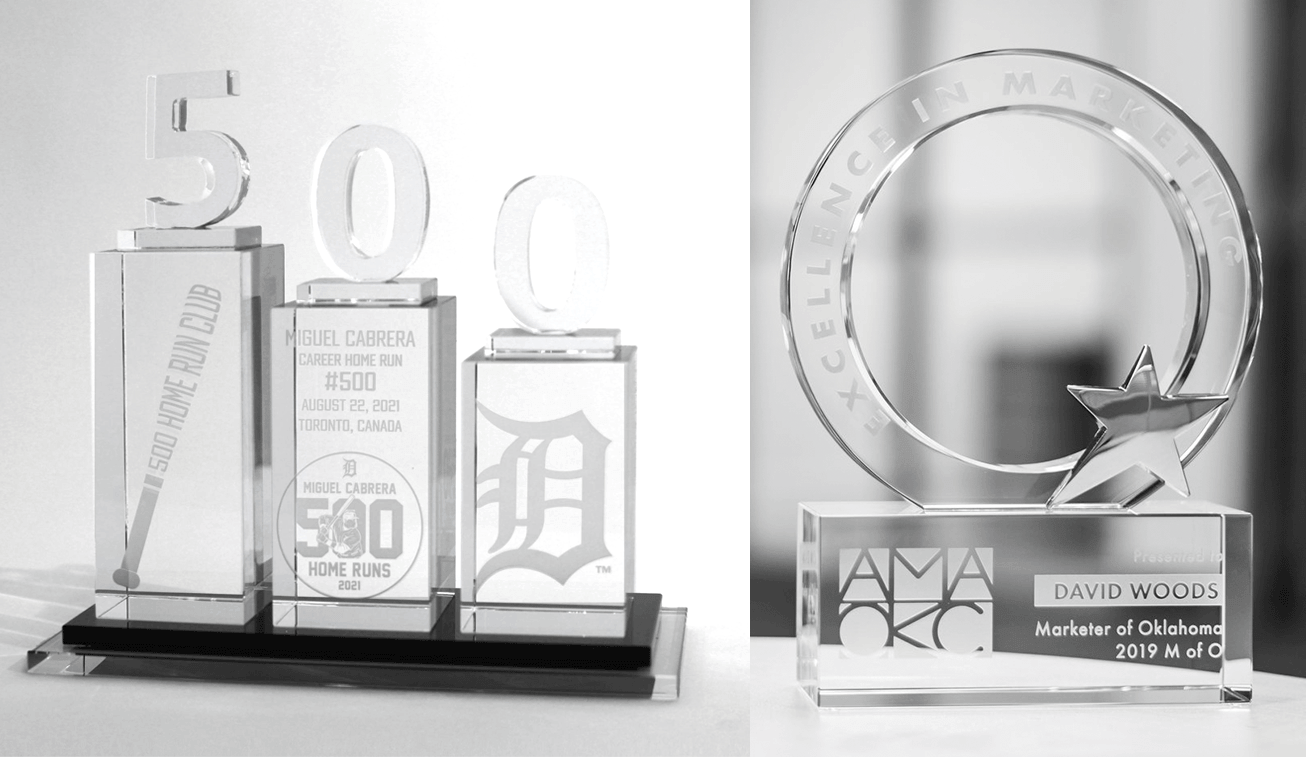
The darker the background color is, the better the photos will come out. Darker background colors present the design and details of the crystal awards, which helps to properly define the edges of your clear object. Using this strategy along with the right lighting, your photos will come out crisper and discernible, especially if the award has a lot of details in it.
We've found success in shooting clear and beveled awards by setting a light gray background when photographing our products. The light grey shades provide a good contrasting color to the transparency of the award and the touches of color decorating it; the light gray doesn't dissolve the award into the background.
CRYSTAL CLEAR CAMERA SETTINGS
You don't have to be a sharpshooter to take good photos of crystal or glass awards. You just have to keep in mind the basic rules of photography, the different kinds of settings on your camera, and shooting from multiple angles to get the best image.
Remember the 3 pillars of exposure, or the amount of light that reaches your camera's sensor or film:
Shutter Speed: LOW
This camera setting increases or decreases the amount of time an image is exposed to light. Increasing the shutter speed takes quicker snaps of photos; faster shutter speed is perfect for shooting moving objects for a crisper photo.
But it lets in less light, which is not recommended for shooting clear awards at rest. By turning down the shutter speed, you gain the ability to let more light into the lens, making for a luminous shot. When you have the lighting settings down, this is the next step to taking excellent photos.
Aperture: OPEN
This is how opened or closed your camera's lens is, allowing in more or less light into the image.
When your lens is turned to a lower aperture or wide focus, more light is let into the camera, at this point, it's necessary to turn up the shutter speed to create a crisp and light-balanced photo. When the lens is turned to a closed aperture or narrow focus, less light is being let into the camera, thus a slower shutter speed is needed to take a good photo.
ISO: AS LOW AS POSSIBLE
This determines how sensitive the camera will be to the light coming in through the lens. The lower the ISO the less sensitive or bright the image will be, while higher settings will snap more blinding images. Use ISO to control how you capture lighting intensity.
Now, having all of this in mind, when shooting clear awards on a white or light gray background, you must adjust the ISO to the amount of light in the studio and turn down the shutter speed to allow enough light to enter the lens.
Clear glass or crystal awards can sometimes be hard to capture, especially when they're shaped differently or beveled, but once you have this down, you'll be taking eye-catching photographs in no-time. But the most important thing to take away from all of this is to take the best photos possible. Take photos that capture the beauty of the awards and that make them desirable for customers.